Showing posts with label crafts. Show all posts

Crafts #13 A Rainbow Sun Learning Our 11-20

I haven't had much time teaching Ko simply cos I had a hard time trying to get Imm to focus and once he is seated there, I will start to do more... and more... and more work till he gets tired (which is pretty fast actually). He writes really slowly but if I am not seated there, he tends to fool around and gets distracted. Sometimes I get to teach both of them (like a tuition group) but not all the time. And I try to have fun while we learn. One good thing is that both of them love crafts! So today, I focus on Ko while we do our art.

Materials needed:

1) Paper plates
2) Yellow paint
3) Wooden pegs with Written Numbers
4) Colourful strips of Paper


First we started on the painting. Imm founded the paint too watery and started to cry. Haha...


He enjoyed twirling the paper around though. I could not take much pics of Ko as most of the time I am helping her... :)

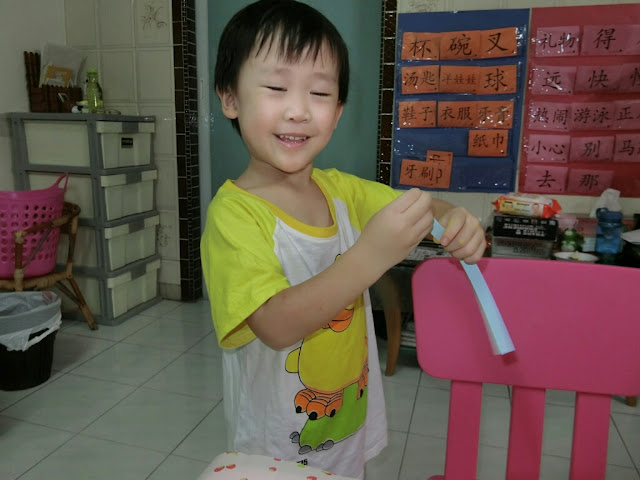

After twirling, we would stick the strips of paper to the back. And we would paste eyes! I drew a smiling face for her.


After that, I would go through with her 11-20 and asked her to peg it in order. Although she could recite the numbers, she still has difficulty recognising. If you showed her "12" she would not know what is it. I always believe in having fun while learning.


Imm preferred to do a sad face. :|


Tada! Happy with their work!


Crafts #12 Basket Weaving (An Easter Idea)

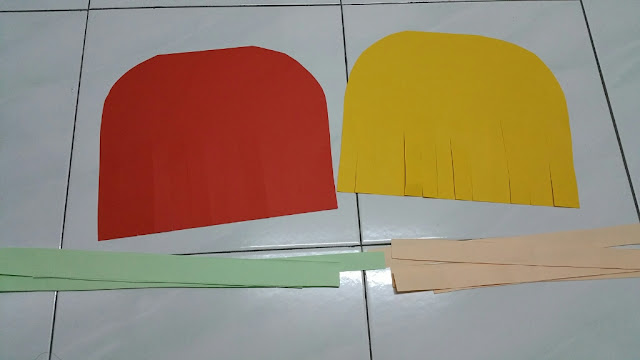
I was looking for another idea for Easter and found an idea that is pretty feasible. Nowadays I am pretty limited in time, even though the children are schooling. I would do the housework, bake, cook on alternate days and plan materials for the kids. Or meet friends. So I thought this was pretty easy. I didn't do it as precise as I wanted but I thought it served the purpose. First, I cut out the shape of the basket and cut strips on them like this. I also prepared strips of paper of two colours.


First, I had to stick one end of the strip to the basket so it would not come out. Imm loved to weave it through like this. After he finished, I would stick the other end of the strip to the basket. For the next strip, just put it in an alternate way to weave so it would look like the basket at the end of the post. :)


I cut out the shape of the handle before laminating it. Imm wanted to cut it himself after I laminated it.


Ko need more help in terms of weaving. I thought her a new word "alternate". I would tell her to help me lift up the alternate piece so I can weave the paper in and she would follow instructions after I demonstrated.


Both very pleased with their products! You can put pics of Easter eggs. I have not got round to doing it yet though Easter Sunday is over.:) But I intend to do an addition/subtraction/division game of sorts for the fun of it.


How the baskets looked like:


Crafts #11 Easter Rabbits

It has been sometime since I started on my crafts again. First, I needed to organise my art and craft box and then see what I needed again as all of the art and craft stuff were shipped away. I could not bring the stuff back as we already had 8 luggages of things and in Singapore, it was actually easier to shop for craft stuff, I usually get from daiso, spotlight, art friend and popular. So after organising, doing a bit of shopping and researching on simple ideas, I finally found a simple and cute idea for our Easter. Making Easter rabbits!

The materials are actually very simple:

1) Plastic eggs
2) Pipe cleaners
3) cotton balls
4) Glue and scotch tape


First, I cut the pipe cleaner into half. Ko wanted to cut so I let her pose with it. Actually both Imm and Ko understood the dangers of scissors as I felt the importance of finger training. After I see how they handled it, I spoke to them about the dangers and told them there must always be an adult present when they are using. Now Imm will cut something that he wants to open up (packet of sweets? )with a scissors. He became rather independent. For Ko, she does not have the strength yet but she is trying to put her fingers properly through it now.


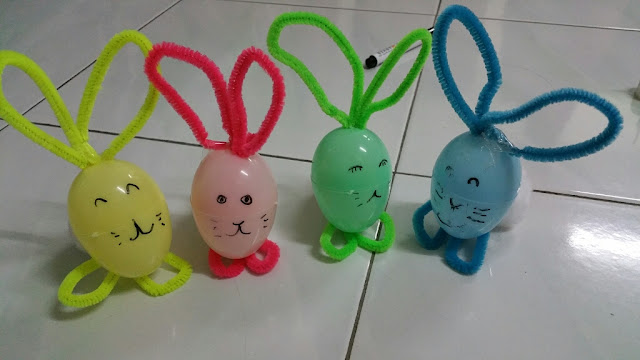
There were two holes in the plastic eggs so after cutting, we just folded it in like the rabbit's ears.


Imm was very insistent on drawing the face, so he drew for one of the rabbits.


However, the kids got a bit distracted after a while and I had to finish up the other 2 rabbits and pasted the tails using cotton balls (with glue) and pasted the feet using scotch tape.

Tada! After that, they enjoyed playing with the rabbits.. hmm..


Well, not all art and craft sessions are smooth sailing but I always tell myself that it is the process and the time together that is important. As the children love it, I see it as an opportunity to engage their creative minds and let them see that they can create anything they want as long as they have the image of the final product in their heads. That is why I always show them the picture of what we are going to do that day for them to have an idea. :)

Crafts #10 5 Minute Valentine's Day Idea

Yes, I was just rummaging through my storage of ideas box which is actually found in my phone. I would screenshot certain ideas I see when reading articles related to parenting/craft etc and revisit them when I have the extra time. And it pays off when a great idea comes upon that does not require much time. Why great? It is not as though expensive material was needed or it teaches them a great deal of information, it is just great because it takes 5 minutes to prepare and they took more time, (maybe 6 minutes) to enjoy it? :) That itself is a great achievement. Moreover, the cloud of shortage of time looms above me as I have been spending time packing.... and since my printer broke down after a good almost ten years, it gave me the chance to do more art and craft with the kids instead of printing material out and making them. As the saying goes, when life hands you lemons, make lemonade.

I came across this idea at http://www.stillplayingschool.com/2015/02/salt-and-glue-watercolor-hearts.html. It looks so much nicer here. :)

Anyway here was all I needed:

1) coloured paper
2) a tube of clear glue
3) salt
4) food colourings
5) dropper bottles

First, I used glue to draw the hearts and words out. Then I sprinkled salt over the glue and let it dry.


I put water in dropper bottles and added a couple of food colourings; one bottle contained blue colouring and the other contained red colouring. Imm did not need much help and just dropped the water on the words. 


He loved seeing the colour spreading. I could see he really enjoyed it and that gives me ideas that I should do more of this. I wished I had done more hearts for him to "colour". I would always look at their response to stir my creative juices on what to do with them next time.


Ko needed more help to control the water especially in drawing the water up. But she could drip the colours onto the picture outlines rather well.


And that is not all, after that, I prepared cotton balls for them to drip the colours on and to witness colour change. Once in a while, I would do colour change activities with them using dropper bottles as Imm really loved it and it occupies both of them for a long time.


There he goes! Play it in a tray and that is where the mess goes. :)


Crafts #9 New Year Resolutions!

I have been wanting to do this and just managed to find the time recently... though we are almost 3 weeks into Jan.. However, it is still early right? We are still in the first month anyway... I got this idea from the blog www.ahappymum.com again.. but I differ slightly in materials... so it really depends on what you have...

I enjoy doing crafts and especially those that are significant in making you commit to a certain action.. thus I thought this was a rather good idea...

This was what I used:


1) foam paper
2) movable eyes
3) sequins to decorate
4) glue
5) scissors 
6) short sticks
7) Post it pad

First, I ask them what kind of clothes they wanna wear as each "puppet" represents them. Don't give them too many colours to choose or it will take forever. They will choose a colour for the top and bottom while I will cut it out and let them paste. They will then paste the eyes and I draw in the nose and mouth. 

Next, I asked them to think of their new year resolutions. They suggested one while I prompt them with the other two. 

We will paste the post it pad on the "puppet" and Ko decorated hers with sequins while Imm left his as it is.... as he probably thinks is too girly.


We then pasted the stick at the back so we are able to hold it.


At the back of it, I used foam sticker numbers to put in the year.


Tada!!!


What is my resolution?

1) I promise to keep myself energetic and happy so I can give the best to the family
2) I promise I will think of ideas to do crafts and not laze around too much
3) I promise to commit to better myself everyday so I can bring joy to others around me
4) I promise to try my best to pray daily even if husband is working overseas so the children can continue to grow in their faith journey.

I didn't do the puppet for myself as I would have liked to as the kids demanded too much of my help... battery was flat already. I promise to improve in my stamina...............................


Craft #8 Halloween Minions

When Imm was young, he started liking monsters, Jack O Lanterns and things to do with Halloween. Frankly speaking, both hub and I are not into Halloween;  I find it spooky actually and since we are Christians, we should not be advocating the "dark stuff" as I had read on some blogs. Yet, it can also be our own biased adult judgement that these celebrations are "bad" and impose our own views and marred the innocence of children. For me, it is just a good opportunity for some art and craft session. Actually, I tower upon them like a witch when I see their goodie bags filled with "treats", (which I discard about 90 % of it later on).

My eyes glowed with excitement (like a vampire) actually after chancing upon these spooky minions I saw online. I dug out my Shrinky Dinks from my stash. This is what I used:

1) Oil-based markers from Daiso
2) Shrinky Dinks (2 pieces for $2)
3) Zebra marker to draw out the pictures
4) A template I printed out. I am sure you can get yours by searching Halloween Minions


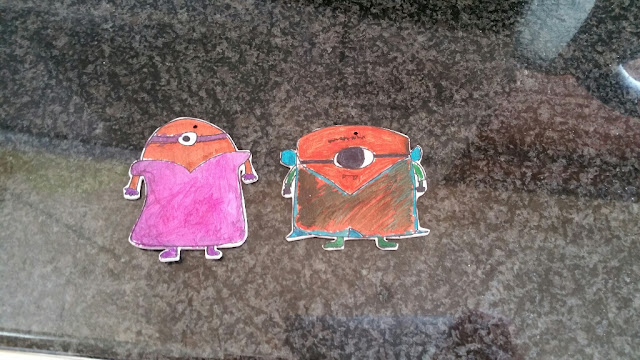
I drew a vampire one for Imm and one in a pink cloak for Ko. This is simple enough for me to draw. Hurray! I hate it when children test my drawing skills as I am no artist. 

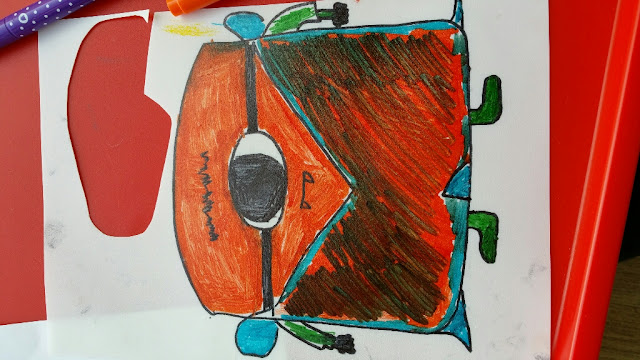
Imm started colouring his.


It feels so good seeing them focus.


At almost 28 months now, Ko can colour within the picture and like to colour on her own. She used to colour the whole page without caring about the picture what was on it.


I helped her to touch up and cut the picture out.


After cutting the pictures out, I put it in the oven which was at 130 degrees. It will shrink up in 30 s. I took them out with a chopstick and used two bases to flatten it before it cools. I had punched two holes in it before putting them in the oven in case they want to use it as a keychain in future. I enjoy shrinky dinks because you can make so many things (accessories, keychains etc) with them. The fun part for the kids is seeing the object shriveling and turning smaller! (I will shine my phone torch for their viewing)


Halloween Costumes for School on that day!!